Internet Account Replication (IAR) - Manual
| Authors: | Peter Fedorow
Brian Tiffin
John Caldwell
|
|---|---|
| Version: | 0.99.7 |
| Date: | 2014Aug05Tue |
| Revision: | 2015Mar13Fri |
Description
IAR replicates POSIX user credentials over the Internet.
It is like NIS, but:
- Is really easy to use – it practically works out of the box;
- Works over the Internet – it is compatible with regular firewalls; and,
- Uses SSH to encrypt the data flow, and GNU Privacy Guard to authenticate the data.
Comparison with NIS
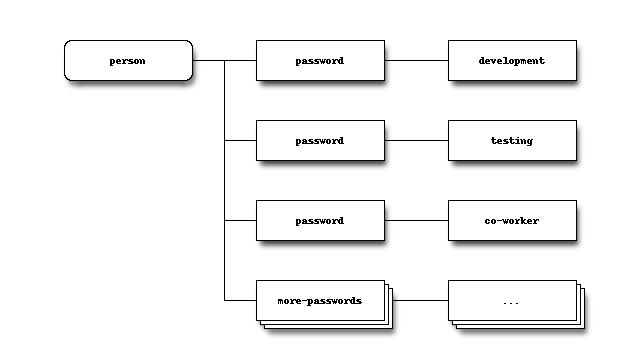
NIS (a.k.a. yp) is a name service for Unix/Linux (hereafter referred to as *nix) credentials. The credentials is the data stored in the files: passwd, group, shadow, and (optionally) gshadow. Despite NIS’s lack of security, it is still in widespread use due to being easy to setup and administer when compared to LDAP, scales reasonably well, and is supported by nearly all forms of *nix.
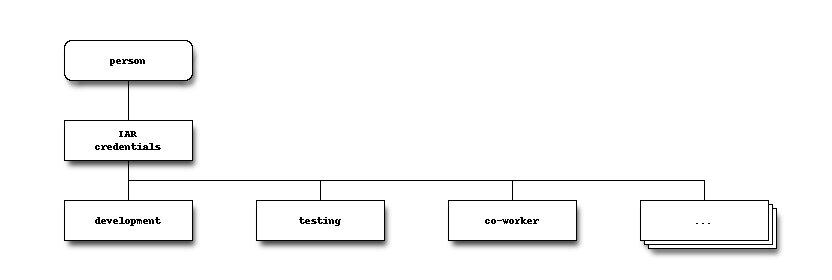
Internet Account Replication (IAR) is intended to provide a modern alternative to NIS. It does not use RPC (portmapper) for data transport, instead it uses a ssh connection. The use of a SSH connection means the data is encrypted in transit, and only a single TCP port is used.
Requirements
Server
- POSIX compatible OS (written to be easy to drop into, or port, to any POSIX OS, but only tested under GNU/Linux - Ubuntu and Fedora)
- sh - dash, bash, or compatible
- GNU Privacy Guard
- ssh server
- nixhash (alternatively for Debian-compatible distros only “mkpasswd” found in the ‘whois’ package)
Client
GNU/POSIX compatible OS (main program is written to be easy to port, but the NSS module is only supported in GNU land). Tested under:
- Ubuntu
- Fedora
sh - dash, bash, or compatible
GNU Privacy Guard
ssh client
sshpass
Getting Started
IAR is available packaged as both .deb (for Debian/Ubuntu), and .rpm (for Fedora). If you are not running a .deb or .rpm-based system, we have designed the software to be easy to install from source. Directions are in the Installing From Source section.
(Need to add directions on how to point to the repo.)
Installation
Recommended: Ensure you have a sufficient supply of true random numbers in /dev/urandom. This is necessary to prevent key generation from hanging. This can be accomplished by setting up a hardware random number generator to feed /dev/urandom. If you do not have a hardware random number generator, install ‘haveged’.
Setup
After installing the packages:
Server
- Run:
iar server-setup
and follow the on-screen prompts.
- Set sshd on the server to listen on the default IAR port. Recommended port: 22322.
nano /etc/ssh/sshd_config
- Add:
Port 22322
- Restart sshd with:
service restart ssh
Note: Do not change the existing Port 22 line unless you no longer want sshd to listen on port 22.
- If you want to change the password for the _iar user, (which is the account IAR clients use to login to the server,) type:
passwd _iar
Remember to set the client password to match in /etc/iar.conf. See Configuration File section for instructions about this.
Client
- Run iar client-setup and follow the directions.
- If you changed the port from IAR’s default, alter the port number in /etc/iar/iar.conf.
- Approve the client on the server. iar approve. You may need to wait up to three (3) minutes because clients poll every three (3) minutes. Alternatively, on the client, type sudo iar client to immediately poll.
Defaults
- hostname
- iar (fallback to default gateway IP)
- username
- _iar
- password
- iar
- port
- 22322
Debugging Hints
- Check the client status: On the client – sudo iar status
- Check the server status: On the server – sudo iar status
- The client will usually provide a useful error message when invoked in the foreground: On the client – sudo iar client
- Check the logs on the server: cat /var/log/iar/iar-server.log and cat /var/log/iar/iar-server-laststatus.log
- Check the logs on the client: cat /var/log/iar/iar-client.log and cat /var/log/iar/iar-client-laststatus.log
Still not working? Try e-mailing rai<reversed> AT hcn-inc.com to politely ask for help.
Safety
IAR builds upon SSH, and adds GNU Privacy Guard validation of the data sent from the master server to the clients. This protects against man-in-the-middle attacks due to both compromised network connections and compromised intermediary hosts.
Out of consideration of convenience for basic (not expert) users, IAR servers and clients install with a default password. This does not readily expose the data on the server to attack because any client attempting to talk to the server requires explicit approval on the server. (This is performed with the iar approve command.) However, the default password does enable an attacker to spoof the server, which means an approved client would login to it, thinking it is the actual server and send its authentication credentials to the fake server. The attacker could then take the captured client credentials, spoof the client’s IP, and replay the credentials to the real server to retrieve the replicated credentials, including password hashes from the server. This would require a moderate level of proficiency with networking, and a willingness to do so. Any reasonably determined attacker with access to your network can accomplish this. Though in most cases, it is easier to boot a workstation from a USB key, and copy the database off it.
To protect against the above described attack scenario, change the IAR client login password from the default to a strong password.
Note: Like NIS and LDAP – without the addition of a Kerberos authentication layer – retrieval of your password authentication hashes, such as from any compromised host on your network, means you are only secure if none of your users have passwords that cannot be cracked by the power of a bot-net of GPU-equipped PCs. As users tend to choose very weak passwords, be warned, and consider deploying a secure authentication layer.
Caution
Please see https://stribika.github.io/2015/01/04/secure-secure-shell.html for some information on configuring ssh(secure shell) to be secure.
Key Recommendations
/etc/ssh/sshd_config settings:
KexAlgorithms curve25519-sha256@libssh.org,diffie-hellman-group-exchange-sha256

# disable password authentication (AFTER more secure forms are in place)
PasswordAuthentication no

Ciphers chacha20-poly1305@openssh.com,aes256-gcm@openssh.com,aes128-gcm@openssh.com,aes256-ctr,aes192-ctr,aes128-ctr

MACs hmac-sha2-512-etm@openssh.com,hmac-sha2-256-etm@openssh.com,hmac-ripemd160-etm@openssh.com,umac-128-etm@openssh.com,hmac-sha2-512,hmac-sha2-256,hmac-ripemd160,umac-128@openssh.com
/etc/ssh/ssh_config settings:
# Github needs diffie-hellman-group-exchange-sha1 some of the time but not always.
#Host github.com
#    KexAlgorithms curve25519-sha256@libssh.org,diffie-hellman-group-exchange-sha256,diffie-hellman-group-exchange-sha1,diffie-hellman-group14-sha1

Host *
    KexAlgorithms curve25519-sha256@libssh.org,diffie-hellman-group-exchange-sha256
    PasswordAuthentication no
    Ciphers chacha20-poly1305@openssh.com,aes256-gcm@openssh.com,aes128-gcm@openssh.com,aes256-ctr,aes192-ctr,aes128-ctr
    MACs hmac-sha2-512-etm@openssh.com,hmac-sha2-256-etm@openssh.com,hmac-ripemd160-etm@openssh.com,umac-128-etm@openssh.com,hmac-sha2-512,hmac-sha2-256,hmac-ripemd160,umac-128@openssh.com
Configuration File
The configuration file (by default /etc/iar/iar.conf) contains script lines that are sourced into the IAR script after assigning default values.
The configuration file on the client may need to be edited to instruct the client about how to reach and login to one or more servers. Client-setup attempts to populate the first entry with reasonable values.
Most users will never need to alter the configuration file on the server.
Security Note: Keep the permissions of the configuration file secure. If you do not, you have handed root-access to others.
Rules for Editing
- The file is case-sensitive!
- There must be no spaces on either side of the “=” or the assignment will fail. This is because the file is a shell “sh” script.
Client Server Assignments
One or more fields must be populated for each server to be polled. Any unpopulated values are pre-populated with defaults.
Replace <Num> with the sequential numbers. The number must be sequential starting from 1.
Server<Num>Host=<hostname | IP address>

Server<Num>User=<login username>

Server<Num>Password=<login password>

Server<Num>Port=<SSH port to connect to>
ie.
Server1Host=iar
Server1User=_iar
Server1Password=iar
Server1Port=22322

Server2Host=cattle
Server2Port=22

Server3Host=foxtrot
Server3Password='dolphin1234567890XYZ@$Y'

Server4Host=192.168.200.1
Server4User=AccountServer
Server4Password='$$$twistedWIND123456'
Server4Port=9001
Components
iar
- client, runs as a service, after network up and periodically
iar-server
- a link to iar
- runs when an iar request is made via ssh
- when in slave mode it passes requests (and data), with caching, from master to clients
iar-nss
- it is an NSS provider
- extends NSS(glibc) to include the IAR replicated credentials (functionally it feeds retrieved account information into passwd, group, shadow)
File System Layout
- Configuration file: /etc/iar/config
- Master Server account data: /etc/iar/master/
- Slave Server account data is passed through: /var/lib/iar/server/
- IAR client data is temporarily stashed in: /tmp/_iar/ then recorded in: /var/lib/iar/client/
- The NSS plug-in reads the data in: /var/lib/iar/client/
Invocation
iar [-h|--help|help]  |  [
           status
           client
           client-dynamicpolling
           server
           client-setup
           server-setup
           servermode master|slave
           approve
           approve-subnet <CIDR>
           adduser <username>
           deluser <username>
           passwd <username>
           lock <username>
           unlock <username>
           lockpasswd <username>
           unlockpasswd <username>
           addgroup <groupname>
           delgroup <groupname>
           remove
           purge
        ]
Sub-commands
status
Displays the program’s status.
Shows if ‘client’ or ‘server’ mode.
- If client:
- Shows name of server used and the time of last successful sync.
- Shows power state information used by dynamic polling.
- If server:
- Shows if running the server.
- Shows if master or slave.
- Shows approved and pending clients.
client-dynamicpolling
- Like the ‘client’ command, but reduces the server polling interval on laptops when the:
- ACPI power adaptor is detected;
- Power adaptor reports “off-line”; and
- ACPI battery provides power information
Then, the polling interval is adjusted based-upon the battery capacity.
Battery Level:
<=10% : Skip invoking client poll
11 - 19% : Invoke client poll once every 90 minutes
20 - 50% : Invoke client poll once every 60 minutes
51 - 100% : Invoke client poll once every 20 minutes
This is what the cron job invokes.
client-setup
- Checks/adds the magic lines to /etc/passwd, /etc/group, and /etc/shadow to enable NSS integration.
- Installs the ‘iar’ NSS module into: /etc/nsswitch.conf
- Sets up upstart init, or rc.d and cron jobs from synchronization.
server
- master mode
- Serves account information to clients from /etc/iar/
- slave mode
- Serves account information from /var/lib/iar/
server-setup
Add user account for _iar
servermode master|slave
Selects between serving data in master mode or slave mode.
approve
Approve pending client hosts, interactively.
approve-subnet <CIDR>
Approve all client connections from an IP address that is within range of the given subnet mask, in CIDR form.
i.e. approve-subnet 10.0.0.0/24
would automatically approve any client from 10.0.0.0 through 10.0.0.255.
This function is specifically intended for virtualation and other special uses. It is UNSAFE and illadvised for general use.
Subnet masks are accumulated in IAR configuration variable, ApprovedSubnets, separated by spaces.
adduser <username>
Add a user account
deluser <username>
Delete a user account
passwd <username>
Change a user account’s password
lock <username>
Lock a user account
unlock <username>
Unlock a user account
lockpasswd <username>
Lock a user account from password login (Keypair login remains enabled.)
unlockpasswd <username>
Unlock a user account for password login
addgroup <groupname>
Add a group
delgroup <groupname>
Delete a group
remove
Removes all client and/or server hooks which are required for operation (Configuration files and logs are preserved.)
purge
Performs a remove then deletes all configuration files and logs
Installing from Source
IAR leverages the GNU Autotools system for builds. For most systems you should be able to:
tar xvf iar-VERSION.tar.gz
cd iar-VERSION
./configure --help
./configure
make
make check
sudo make install
./configure --help shows the available options for installing, in particular
./configure --prefix=/usr
This will install files to the /usr system tree, overriding the default of /usr/local.
If something goes wrong, or there are special requirements involved, the system includes the Autotools bootstrap code. Any changes to configure.ac or Makefile.am should be followed by
autoreconf
./configure
Algorithms
Start Algorithm
- Exit if other copies of iar client are running.
- Check if /etc/iar/config is secure, and attempt to secure if not. Abort if it cannot secure.
- Reads configuration from /etc/iar/config
- If no site-key is found, generate a random one, and attempt to store in /etc/iar/config
- Attempt to make /tmp/_iar/
- Attempt to set permissions.
- Check permissions.
Client Algorithm
If the mode is server-master, set data-destination to “/etc/iar/master/” else set data-destination to “/var/lib/iar/server/”
Retrieve the public key from the config file.
Mark the public key as ‘trusted’.
For each server hostname in /etc/iar/config (i.e. Server1Hostname=”iar.example.com”):
- Set sync destination to “/tmp/_iar/transfer/[server hostname:<port>]/” if writable, else set destination to “/var/lib/iar/transfer/[server hostname:<port>]/”
- ssh to hostname ignoring host-keys, send query data on command-line. #. untar files to sync destination. [passwd group shadow gshadow TimeStamp HashDigest HashDigest.signed] #. Verify HashDigest signature, if not successful, delete transfer. #. Verify auth files against HashDigest, if not successful, delete transfer.
Determine newest file-set version which is not newer than current ms since epoch.
Copy files (passwd group shadow gshadow TimeStamp HashDigest HashDigest.signed) from selected file-set to “/var/lib/iar/client/”
Server Algorithm
Acquire lock.
Ensure we have files to serve.
If in master mode:
- If needed, generate a key-pair and store in config-file
- Set datapath to “/etc/iar/master/”, else slave mode, datapath “/var/lib/iar/”
Calculate checksum of the current version of the data-files.
Exit if hashes match.
If in master mode:
- Generate tar (passwd group shadow gshadow TimeStamp HashDigest HashDigest.signed).
- Retrieve key-pair from config file.
- Sign transfer file using GPG.
Send signed transfer file.
Utilities
The IAR application attempts to keep external dependencies to a minimum, but there are a small few.
nixhash
IAR server relies on ‘nixhash’, for encrypting password entries.
It is not required for Debian-based systems, but it can be used inplace of the ‘whois’ package on embedded systems.
Built with Autotools, there is nixhash.c, nixhash.h with a dependency on -lcrypt.
nixhash is available from the IAR distribution source.
sshpass
IAR uses ‘sshpass’ to allow clients to connect with an IAR server, without need of shared keys.
sshpass is an external dependency.
Status Return Codes
- 0 OK
- 1 Invalid commands and general permission problems.
- 2 Dropped connection due to unsupported protocol version.
- 3 GPG signing key in response data from server could not be trusted.
- 4 GPG server public keyring missing or empty in response data from the server.
- 5 Permission problem when replicating authentication.
- 6 Missing files when replicating authentication.
- 100 Obviously dangerous recursive remove was blocked.
- 101 Shred command, safety net during cleanup of transfer files.
Testing
Most of the IAR testing is manual. sudo or root privilege is required for most IAR operations, as there are confidential authentication files and shared keys involved.
Client Initialization
(This section is in need of update to reflect using the iar “purge” and “remove” commands.)
Ensure there is the most recent copy of iar available.
Some of this testing can be influenced by what files are on the server as well.
Clean-out the configuration file /etc/iar/iar.conf
rm /etc/iar/iar.conf
Clean-out any transfer files that may have accumulated
sudo rm -r /tmp/_iar/
Clean-out any existing authentication files
sudo rm -r /var/lib/iar/
Generate a clean configuration file, edit /etc/iar/iar.conf
This will use a default user account and password.
Then kick an initial test with
sudo ./iar client
Documentation
The main IAR script, iar is commented with ROBODoc comment blocks. API documentation generated with
List robobash.rc, and fill in the proper command line
(cd .. ; robodoc --rc docs/robobash.rc)

options:
    --src ./
    --doc ./docs/robodoc/
    --masterindex "Master index,index"
    --html
    --syntaxcolors
    --multidoc
    --nosort
    --index
    --tabsize 4
    --tell

ignore files:
    debian
    autom4te.cache
    docs

accept files:
    iar
The IAR application bundle is documented with ReStructuredText and Sphinx.
make singlehtml
Notes
To Invoke sshd for _iar Only User Login
Requires creation of a server key pair for the sshd for the _iar account:
Command: ssh-keygen -f /home/_iar/ssh_host_rsa_key -N '' -t rsa -b8192
Command: /usr/sbin/sshd -oPort=22322 -oAllowUsers=_iar -oHostKey=/home/_iar/ssh_host_rsa_key
Debian Control Creation
(You don’t need to do this, it only needed to be done once.)
dh_make -p iar_123.45 --native --email <e-mail address>
NSS Advanced Information
- Check for the NSS module in library path:
- ldconfig -p | grep iar
- Rebuild library cache (necessary after adding or removing any library):
- ldconfig